Scheduling a General Appointment

Feb 03, 2025
 9
9
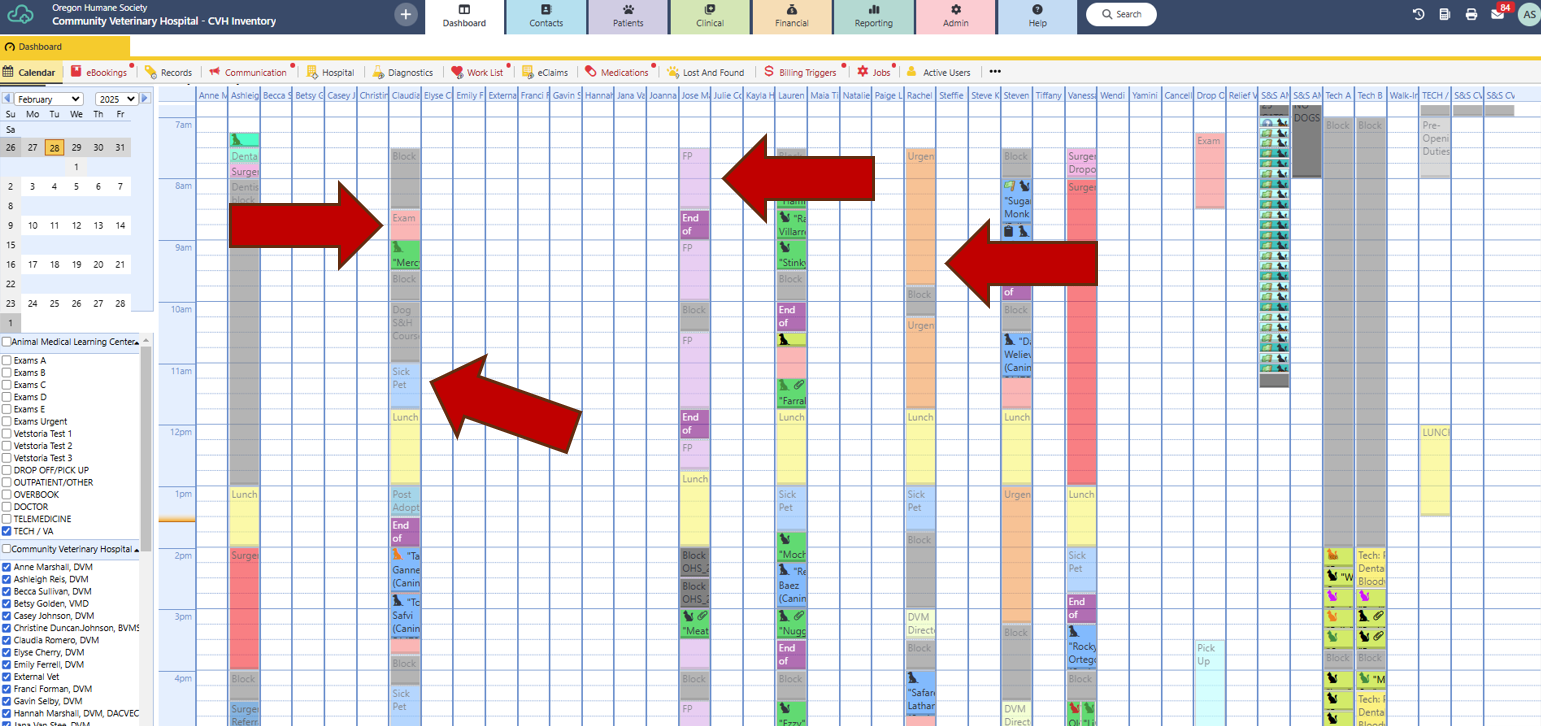
- Determine the type of appointment you need on the Calendar and double-click on the appropriate color block. DO NOT book appointments in the middle of a color block – they must be placed at the top or bottom of the block, or next to another appointment.
![]()
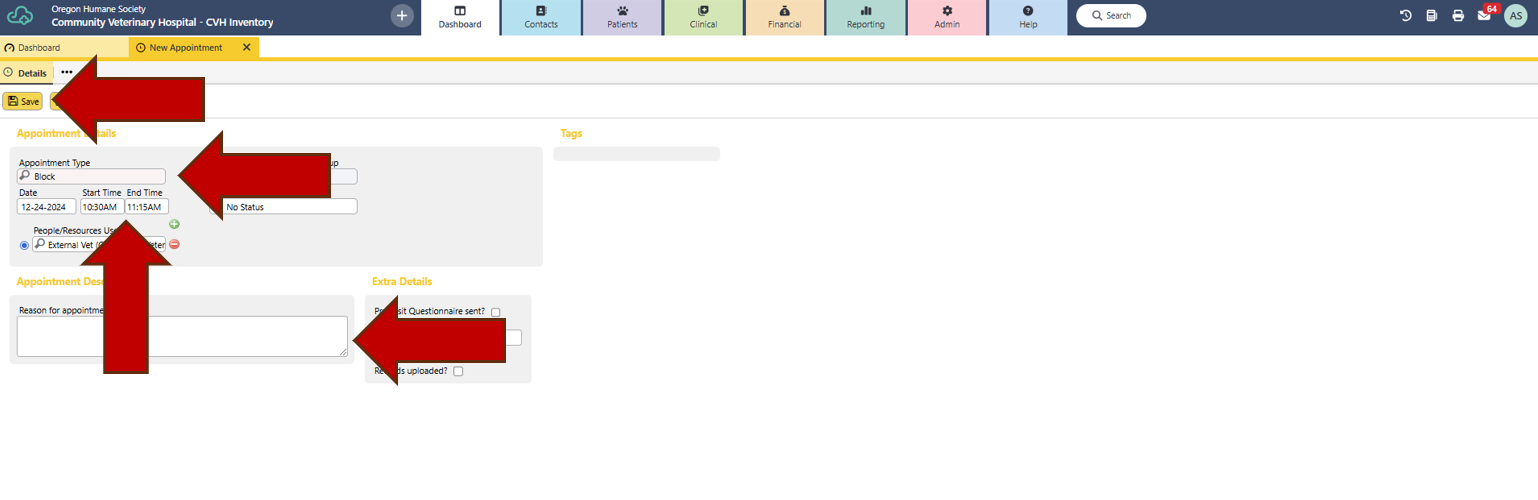
- Select the type of appointment you are scheduling and change the “Appointment Type” to “Block”.
- Adjust the appointment time (20, 30, 45 minutes, etc.)
- Type your name in “Reason for Appointment”.
- Leave tab open and Save.

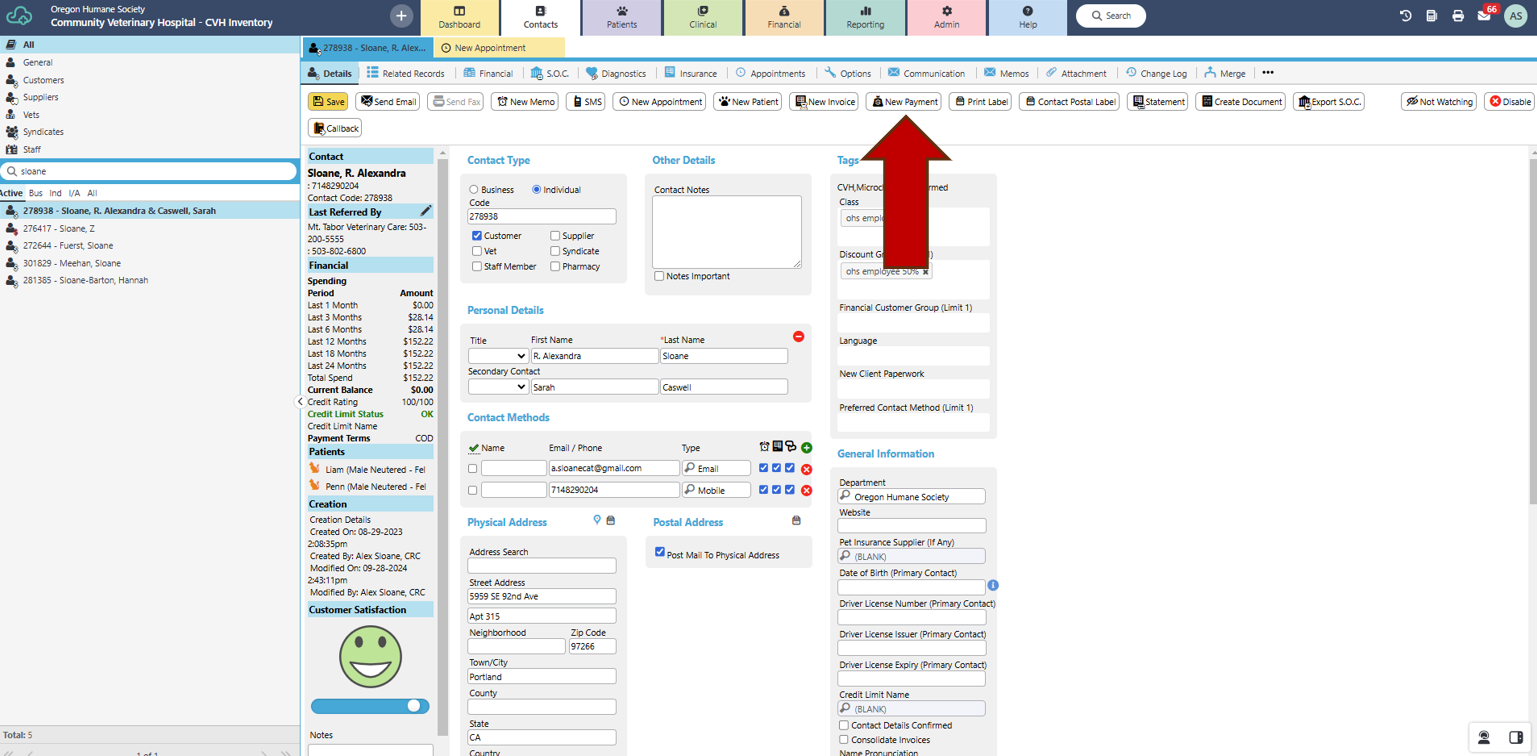
- Select “New Payment” to take deposit.
![]()
- Select appropriate payment type, enter deposit amount, and select “Pay”.

![]()
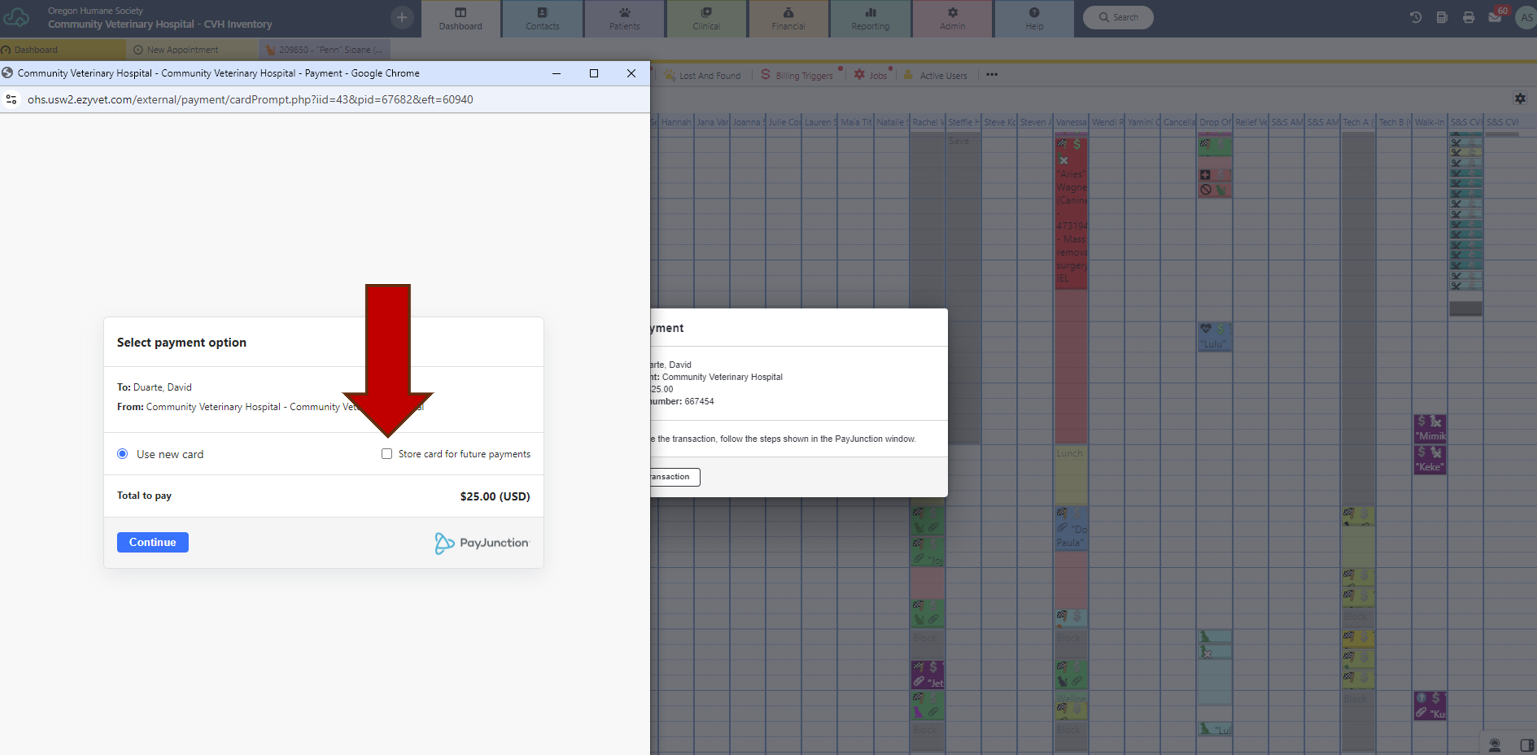
- Ask client if they would like to keep their card on file for future payments. If yes, check box next to “Store Card for future payments”.
![]()
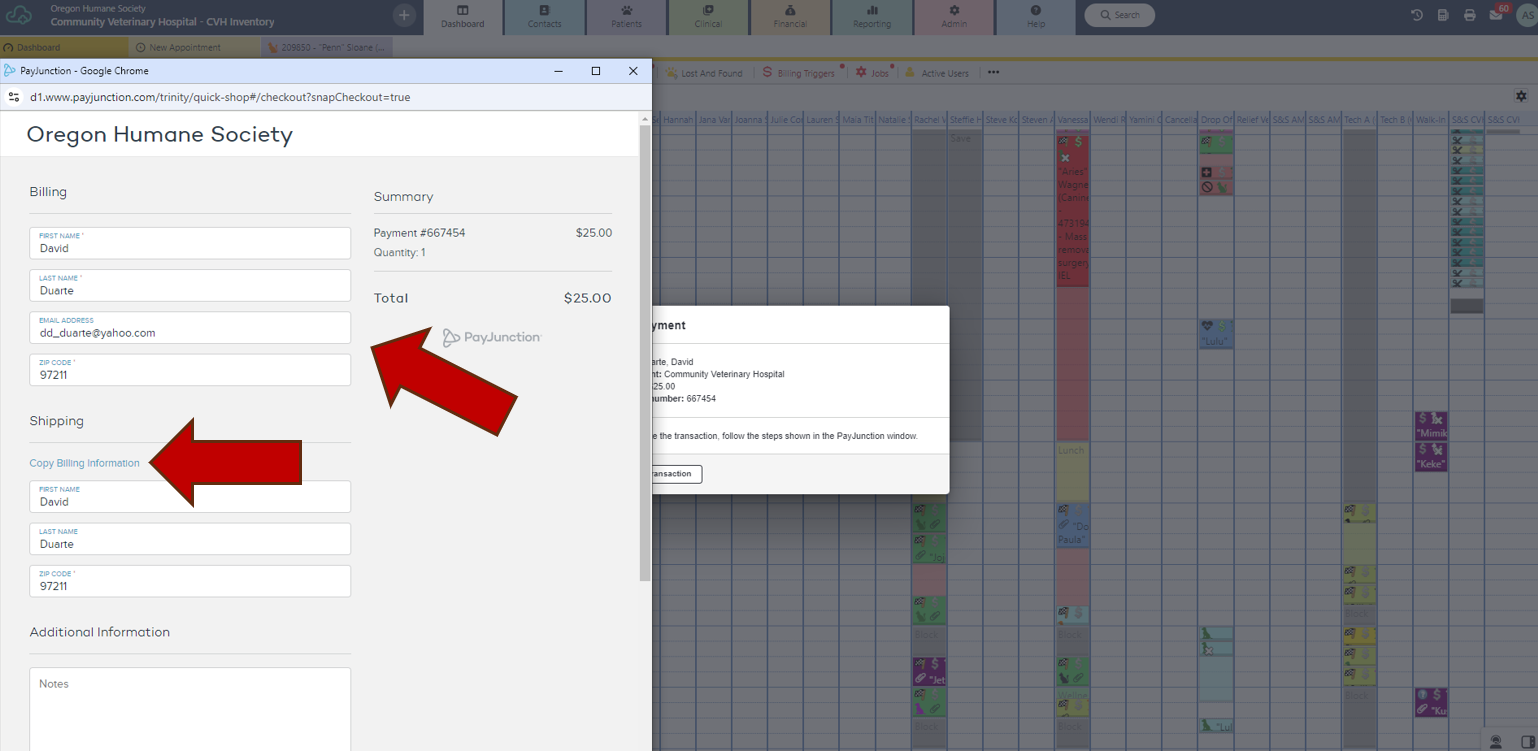
- Confirm that name on card and billing zip code is correct. Update as necessary (we can take payment form someone who is not listed on owner’s profile).
- Select “Copy Billing Information”.
![]()
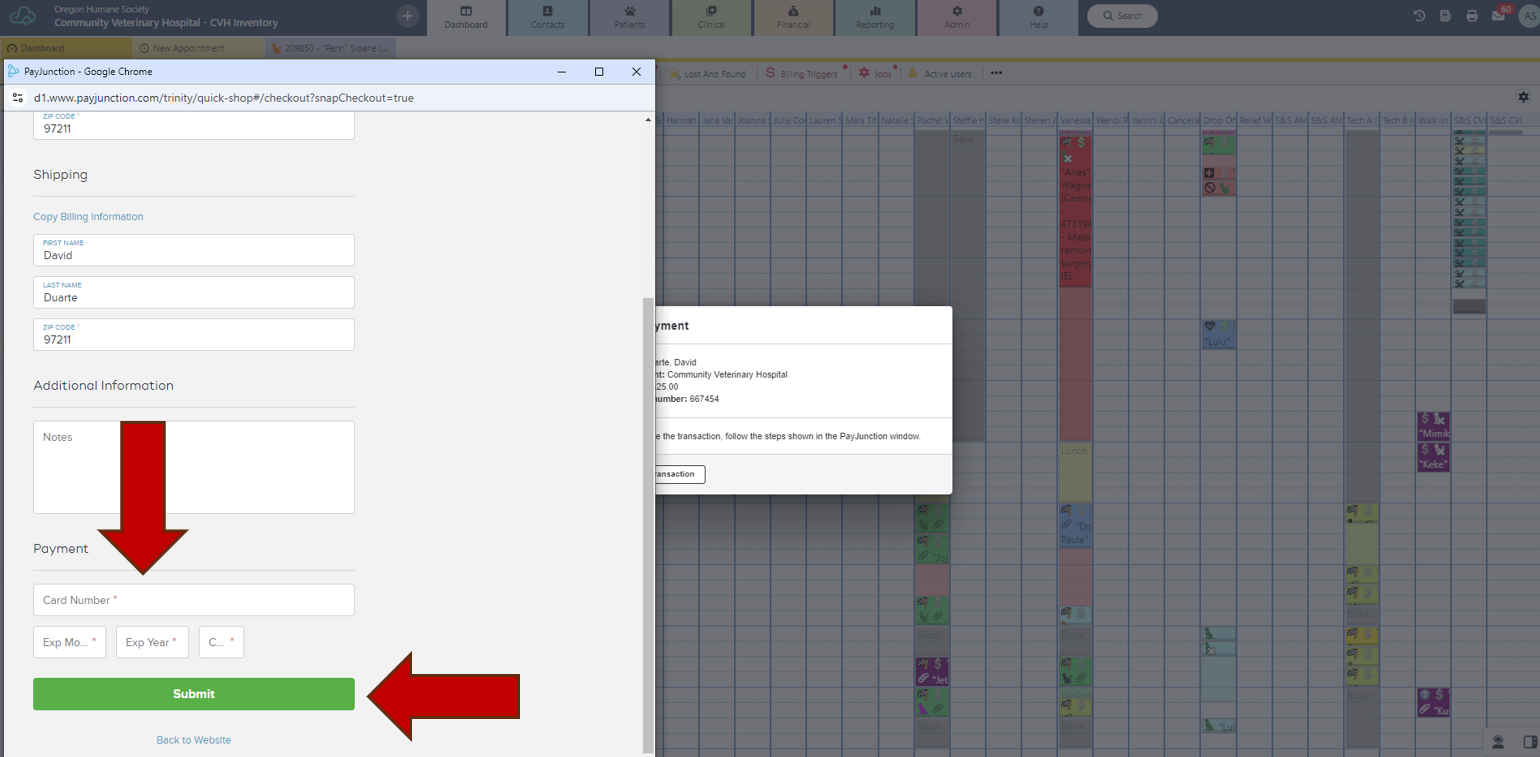
- Enter card number, expiration, and CVV number.
- Submit.
- “Send email” from following pop up to send email deposit receipt to client.
![]()
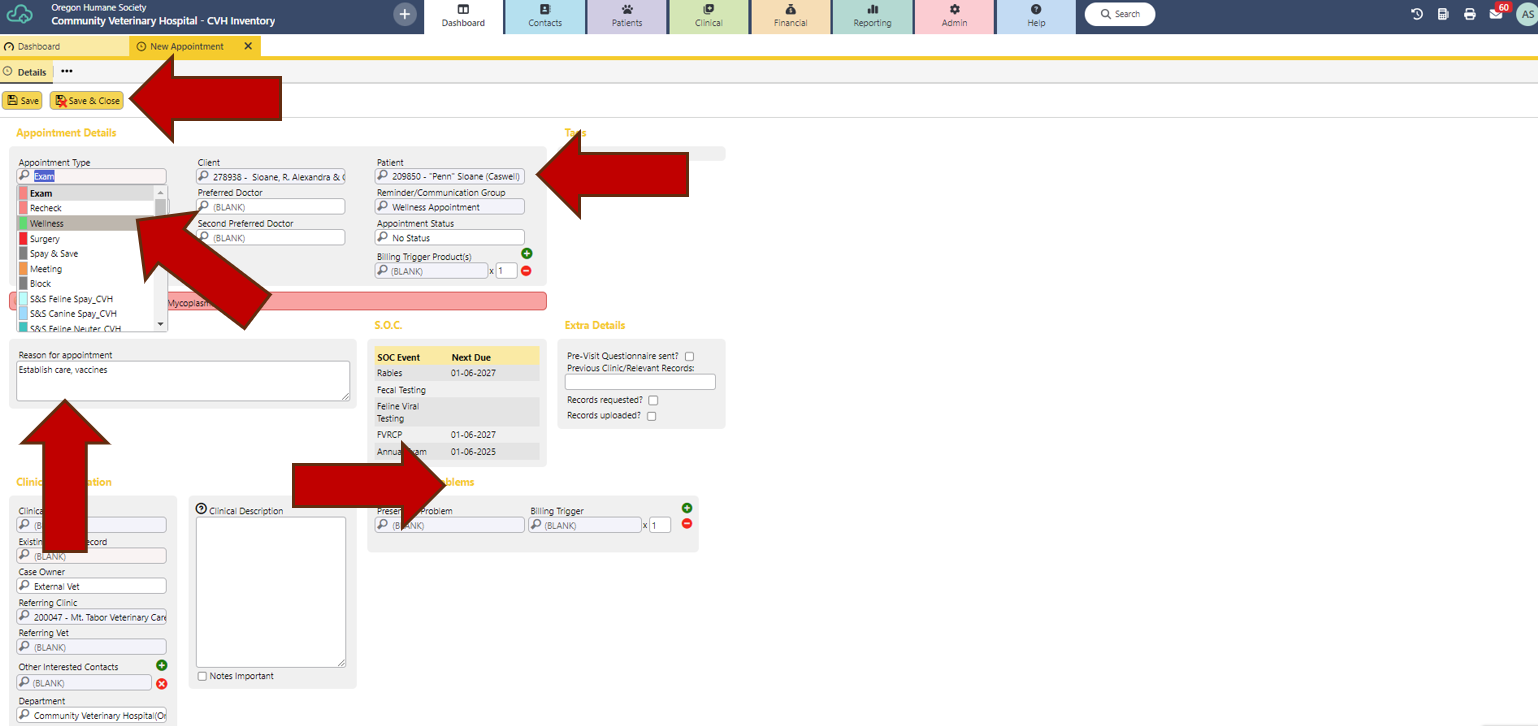
- Return to appointment tab.
- Enter pet’s AID under in the “Patient” field. Owner should autofill.
- Enter appointment details in “Reason for Appointment” field.
- Save.
![]()
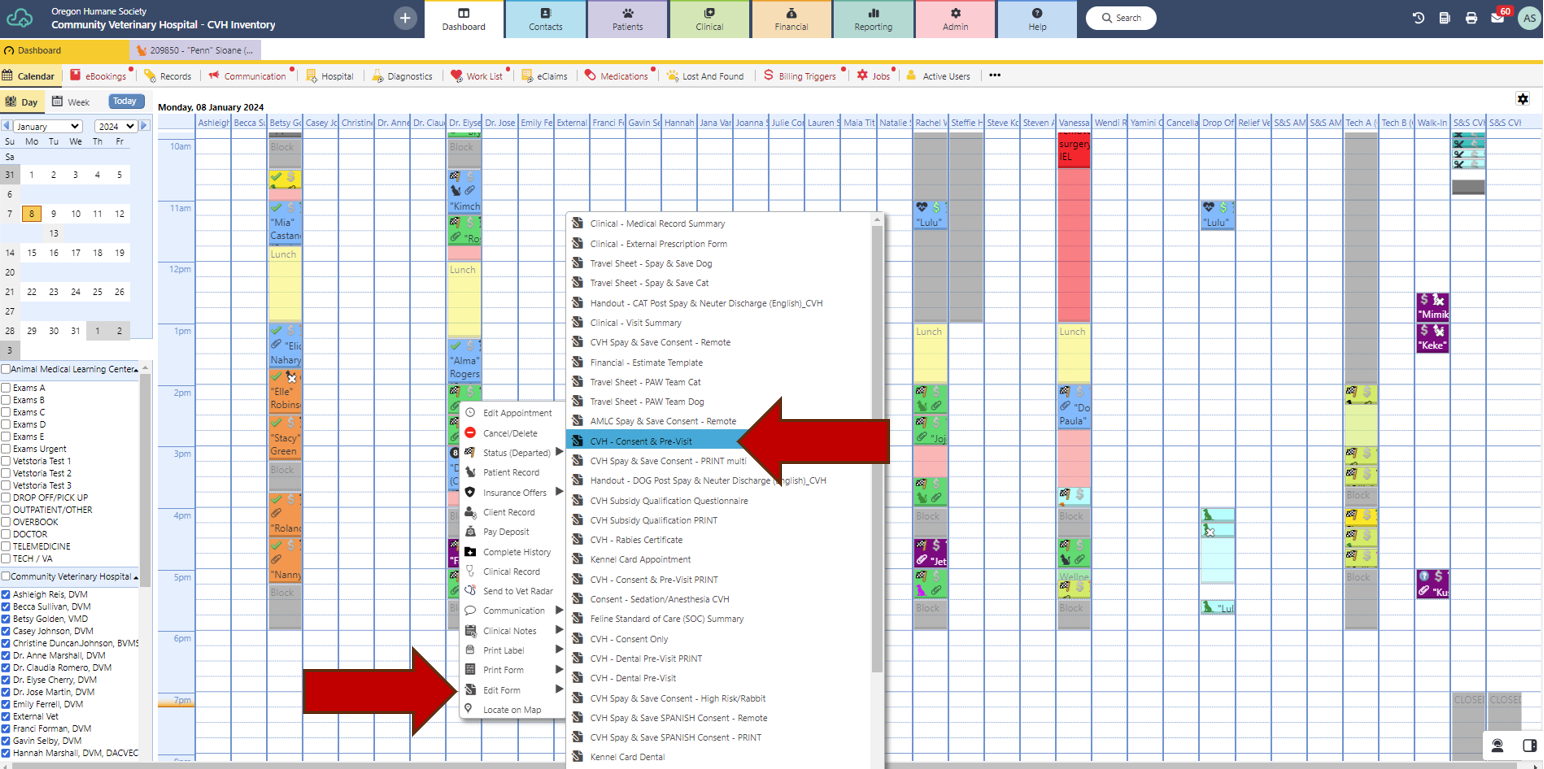
- Return to Calendar, right click on appointment again, hover over “Edit Form”, and select “CVH – Consent & Pre-Visit”.
![]()
- Select “Save”.
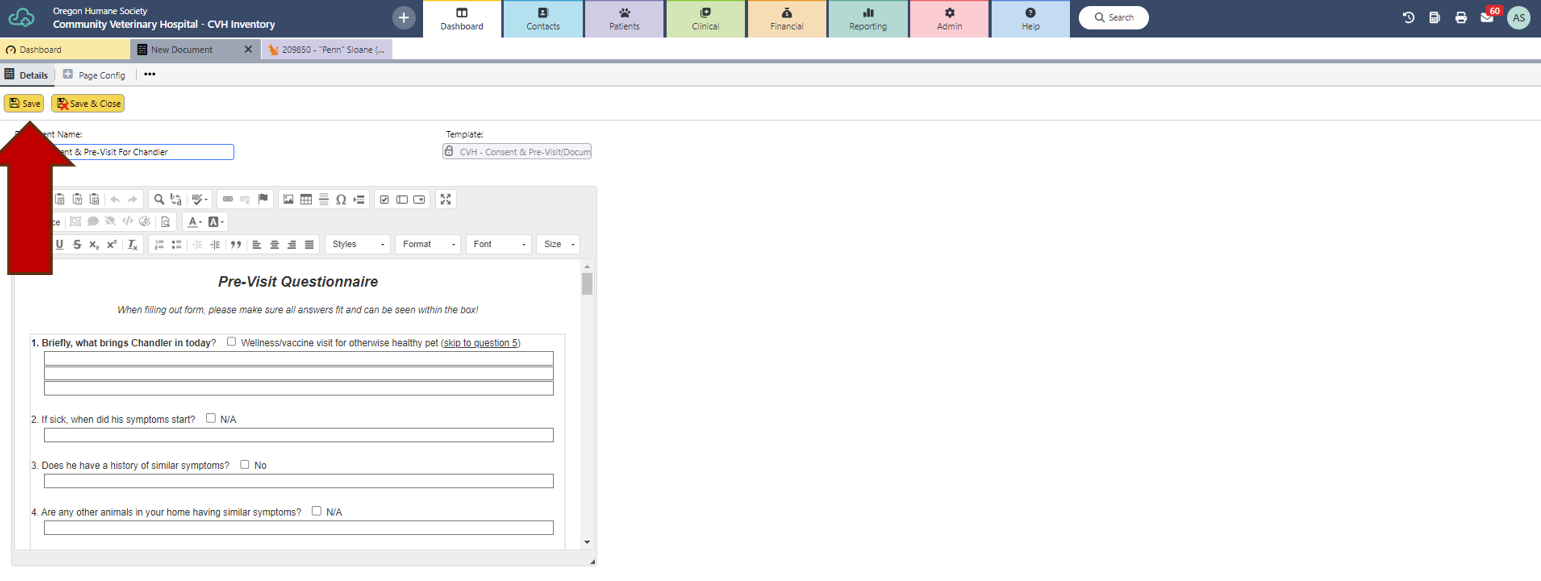
![]()
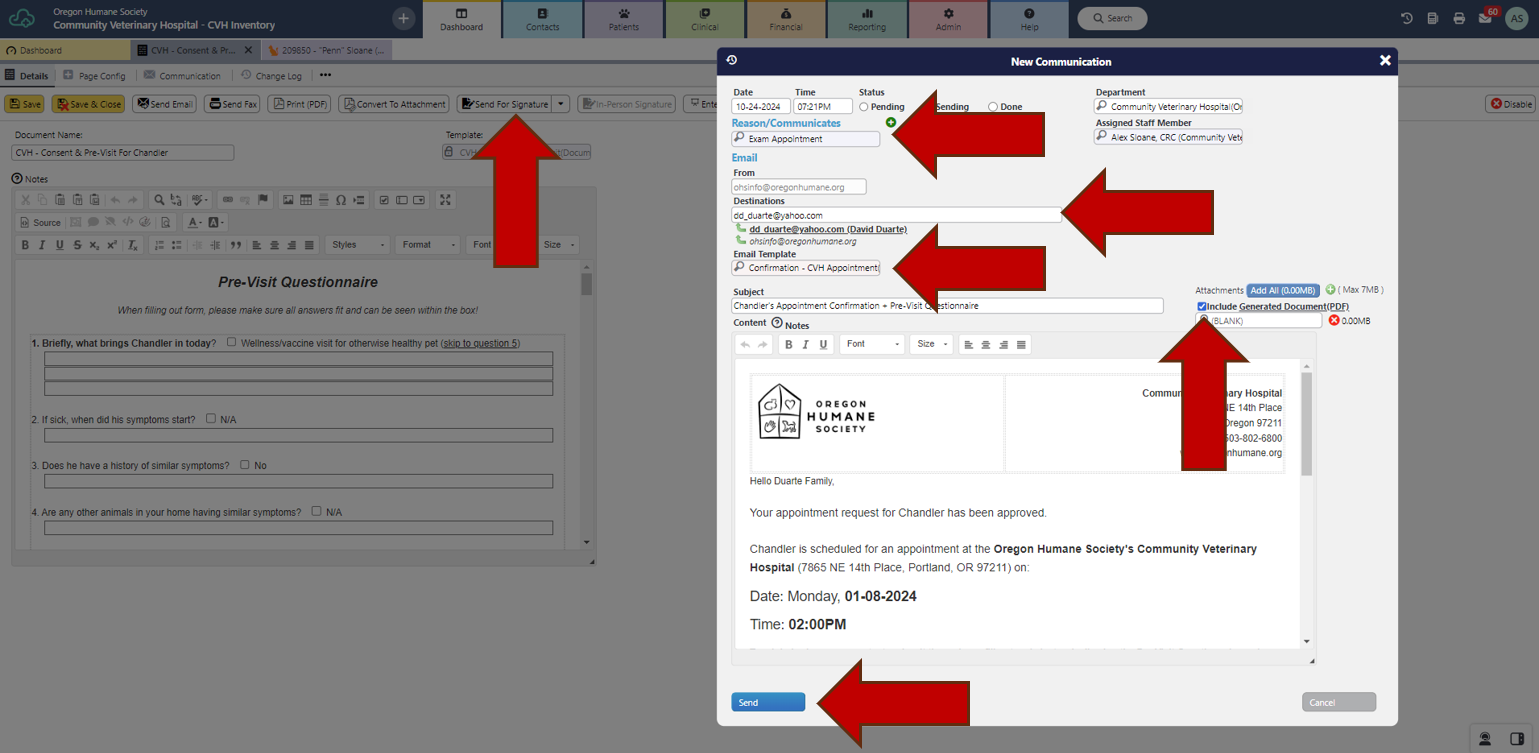
- Select “Send For Signature”.
- Select “Reason/Communicates”.
- Select “Destinations”.
- Select “Email Template”.
- Check box for “Include Generated Document(PDF)”.
- Select “Send” then “Save & Close” consent.
![]()

